Energy Layer - Forneus F4
Main article: Energy Layer - Forneus F4
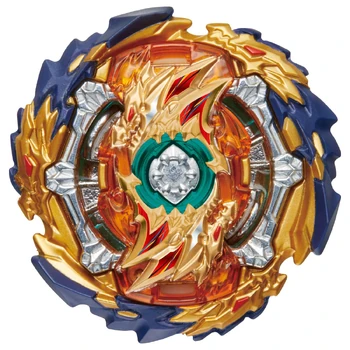
Forneus F4 is a round Defense Type Energy Layer that features twelve counter-clockwise blades that create a low-recoil design and two shark heads that go from the perimeter to the center, meant to represent the Layer's namesake; the sea monster Forneus, a Great Marquis of Hell in demonology, the sea monster. As part of the Cho-Z Layer System, Emperor Forneus features metal in its design; in this case, in the shark details. The inclusion of metal makes Emperor Forneus heavier than most SwitchStrike/God Layers.
Forneus F4 is a round Defense Type Energy Layer that features twelve counter-clockwise blades that create a low-recoil design and two shark heads that go from the perimeter to the center, meant to represent the Layer's namesake; the sea monster Forneus, a Great Marquis of Hell in demonology, the sea monster. As part of the Cho-Z Layer System, Emperor Forneus features metal in its design; in this case, in the shark details. The inclusion of metal makes Emperor Forneus heavier than most SwitchStrike/God Layers.
The placement of the metal improves Defense potential by not only increasing the weight but by creating a Centralized Weight Distribution which resists movement. However, the blades of Forneus F4 are warped which creates recoil akin to Nova Neptune or Psychic Phantom, and the Centralized Weight Distribution creates poor Stamina, though the warped blades can create Destabilization potential and the heavy weight and strong teeth of the Takara Tomy release of Emperor Forneus can compensate for the recoil.
Like many other Cho-Z Layers, Emperor Forneus is unbalanced which increases Burst risk and drains Stamina. However, these issues can be solved with the use of a Level Chip that fits underneath the Layer.
Forge Disc - 0
Main article: Forge Disc - 0
0 is a symmetrical Forge Disc that's elliptical in shape in order to facilitate a Disc Frame. Each side features one protrusion, each wide and smooth enough to almost make the Forge Disc perfectly circular if not for the notches needed to add a Disc Frame and a molded "0" on each side. The protrusions extend further and are thicker than most other Forge Discs which makes 0 the heaviest Forge Disc at the time of writing and implies high Outward Weight Distribution and Stamina potential. In reality however, more weight is focused towards the center, which creates Centralized Weight Distribution that reduces its Stamina to that of 2's. As such, 0 is outclassed by 7 for Stamina Combinations but 0's greater weight makes it ideal for Attack and Defense Combinations. Furthermore, the round shape of 0 creates high Life After Death, even without the use of Disc Frames such as Cross. While the weight can increase the risk of Bursts, the weight of most SwitchStrike/God Layers and Cho-Z Layers can compensate.
0 is a symmetrical Forge Disc that's elliptical in shape in order to facilitate a Disc Frame. Each side features one protrusion, each wide and smooth enough to almost make the Forge Disc perfectly circular if not for the notches needed to add a Disc Frame and a molded "0" on each side. The protrusions extend further and are thicker than most other Forge Discs which makes 0 the heaviest Forge Disc at the time of writing and implies high Outward Weight Distribution and Stamina potential. In reality however, more weight is focused towards the center, which creates Centralized Weight Distribution that reduces its Stamina to that of 2's. As such, 0 is outclassed by 7 for Stamina Combinations but 0's greater weight makes it ideal for Attack and Defense Combinations. Furthermore, the round shape of 0 creates high Life After Death, even without the use of Disc Frames such as Cross. While the weight can increase the risk of Bursts, the weight of most SwitchStrike/God Layers and Cho-Z Layers can compensate.
Performance Tip - Yard
Main article: Performance Tip - Yard
Yard features a free rotating ball tip, akin to its predecessors Orbit and Atomic, surrounded by a wide ring, akin to Defense. In theory, the ball tip would increase a Beyblade's KO Defense by having greater surface area and friction and the wide ring is meant to make contact with the stadium floor when the Beyblade is struck, forcing it back upright and acting as brakes to prevent KOs. However, in practice the free rotating nature of the ball reduces most of the KO resistance given by the surface area of the ball and the diameter of the ball makes contact with the ring rare. Unlike other ball based Performance Tips, Yard does not feature tabs around the tip as their purpose have been taken by the wide base. If launched hard, the greater surface area creates a semi-aggressive movement pattern early in the battle, bringing the Beyblade close to the Tornado Ridge.
Yard features a free rotating ball tip, akin to its predecessors Orbit and Atomic, surrounded by a wide ring, akin to Defense. In theory, the ball tip would increase a Beyblade's KO Defense by having greater surface area and friction and the wide ring is meant to make contact with the stadium floor when the Beyblade is struck, forcing it back upright and acting as brakes to prevent KOs. However, in practice the free rotating nature of the ball reduces most of the KO resistance given by the surface area of the ball and the diameter of the ball makes contact with the ring rare. Unlike other ball based Performance Tips, Yard does not feature tabs around the tip as their purpose have been taken by the wide base. If launched hard, the greater surface area creates a semi-aggressive movement pattern early in the battle, bringing the Beyblade close to the Tornado Ridge.
While these features may imply that a Yard Combination would be easy to KO, in reality the heavy weight of SwitchStrike/God and Cho-Z Layers, Core Discs and Yard's own weight compensates for the rotating ball. Furthermore, the free rotating tip increases Burst resistance. While the shape of the base can create Life After Death and may imply high Stamina and Spin Equalization potential, the low placement of the base creates a high scrape risk and the lack of free rotation in the base nullifies Spin Equalization potential.
Yard is slightly shorter than most other Pre-Cho-Z Performance Tips. In theory, this is meant to prevent the opponent's Layer from striking the Yard Combination from below and Destabilizing it, thus increasing Defense potential. In practice however, due to the design of the Burst System, this increases the chances of Disc-to-Layer contact and can potentially Burst the Yard Combination. Though the only minor reduction in height mitigates the effect.